We know why you are here! You have a hard time figuring out the ‘Unknown Sender Message not Found’ issue on your Android phone. Isn’t it?
If so, then you are not alone. As a matter of fact, thousands of android users have had the same complaint. Even many of our dear readers have wanted to know the solution and the reason behind this issue. As always, we thought it is high time we write a detailed and easy-to-follow tutorial on this particular issue.
As a result, we have come up with this post. In this post, you will find multiple probable solutions to the ‘Unknown Sender Message Not Found’ problem on Android phones. By the time you have read this post, we believe you would solve the issue regarding this 4504 Message Not Found error.
So, without wasting more time, let’s get to business…
What is the ‘Unknown Sender Message Not Found’ Issue, and Why Does It Occur?
Truth be told, the ‘Unknown Sender Message Not Found’ issue is a mysterious one. Nobody can tell you for sure about the source of this problem. Yes, we have contacted many service providers and mobile brands, they also were not sure.
Some users even call this the ‘4504: Unknown Sender Message Not Found’ or ‘4504: Message Not Found’ error.
Now, the problem arises when an android phone user receives text messages like this: ‘Message Not Found’ or ‘4504: Message not found’, or ‘No Messages’ or blank messages. Usually, the sender, in this case, would be ‘Unknown Sender’ or ‘Unknown addresses.
That means you are receiving messages on your phone. But those text messages are not from any valid sender, and the texts don’t contain any valuable information.
There could be a few reasons behind this problem. For instance…
Reason #1 It Could Be Your Service Provider
The first reason could be related to your service provider. Let’s say someone has sent you a text message on your phone number. But when they have sent the message, you are in a place where there is little to no coverage of your particular service provider.
And, due to the coverage issue of your service provider, the message will not reach you. In this case, an error message like ‘Message not found’ or ‘4504: Unknown Sender Message Not Found’ would be received on your phone instead of the real one. Now, you might receive this type of error message multiple times.
Because the service provider will try to send the message to your number automatically from time to time until you have received it, you will also receive these incomplete messages until you are in a place with the good network coverage.
Reason #2 It Could Be Your Phone
The second possible reason could be your phone. Normally, if there is a problem with the default messaging app on your phone, it could show you these incomplete messages. Add that your phone memory is full, and your phone cannot receive any more messages.
In these situations, the actual texts will not be shown. But you will find notifications about the ‘Unknown address/number/sender’ as usual as the message cannot be received by your phone.
How to Fix the ‘Unknown Sender Message Not Found’ Issue
So far, we have talked about a couple of probable reasons behind the ‘Unknown Sender Message Not Found’ error. In the next section, we will share some fixes to this issue. Remember, it is a very peculiar problem of which there is no definite solution.
So, we will walk you through a few possible methods of fixing the issue yourself. The best idea would be to try all of the methods described below one by one. So, let’s go…
Method #1 Restart Your Phone
First and foremost, we will start with the most obvious solution. Yes, we are talking about restarting your phone. You might think that it is not a good solution.
But believe it or not, many users have reported that after restarting their android phones, the ‘Unknown Sender Message Not Found’ error was fixed on its own. You should already know how to restart your device. If not then, follow the basic steps below to accomplish it.
Steps to Follow
- Simply press and hold the Power button on your phone for a few seconds until the ‘Power off’ and ‘Restart’ options appear on the screen.
- Then, tap on the ‘Restart’ button on the screen, and your phone will restart.
Method #2 Reseat/Replace the SIM Card
The number 2 method is another simple yet effective method. Many users have also talked about this method positively. This method will come in handy if the problem is with your SIM card.
Sometimes, if the SIM card is not placed into the phone, you could face network issues. So, the best solution to this problem is to reseat the SIM card.
Steps to Follow
- If your phone has a removable cover, then you have to remove the cover first. For some models, you might have to remove the battery as well to find the SIM card.
- Then, find the SIM tray and slide out the SIM card from there
- Next, reseat the SIM card properly into the tray and attach the battery/back cover accordingly
- And if your phone doesn’t have a removable back cover, then it would have the SIM card at the side of the phone
- In this case, you will have to use a SIM ejection pin to open the SIM card tray from the side of the phone and remove the SIM card from there
- Next, you will have to insert the SIM properly at the SIM card tray and insert the tray inside the phone.
If the problem was due to the improper placement of the SIM card, it should be gone by now. However, you can also try changing the current SIM card to another one. If the problem was related to the current SIM card being faulty, it should be solved.
Method #3 Clear the Cache of the Message app
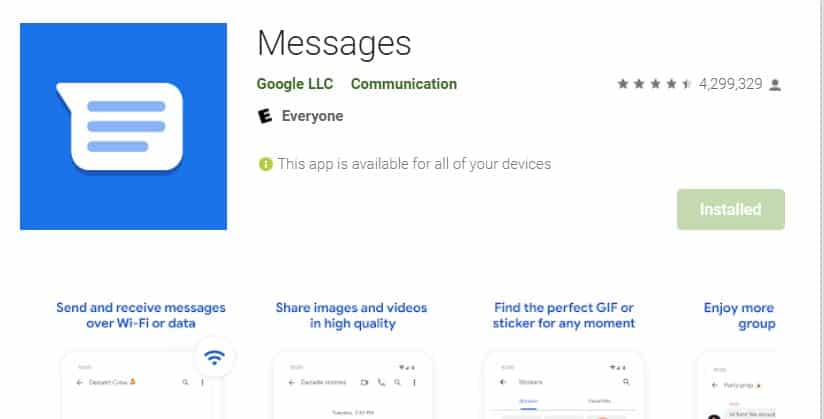
Every phone comes with a default messaging app. The app’s name varies from phone to phone, such as ‘Messages’, ‘Message’, ‘Messaging’, etc.
One solution to fix the ‘Unknown Sender Message Not Found Android’ error is to clear the cache of the default messaging app on your Android phone.
It is effortless to clear the cache of an android phone. However, based on the software version and phone model, the steps will vary a bit. As a result, we will share a basic method that should be very similar to almost all the android phone models out there. Here we go…
Steps to Follow
- First of all, go to the ‘Settings’ menu on your phone.
- Then, tap on the ‘Apps’ or ‘App’ or ‘Applications’ option from there (option name will vary depending on the phone and software)
- Next, you might have to tap on the ‘Apps’ option once again. It depends on your phone; you can skip this step if you don’t see any options named ‘Apps’ at this point
- Now, you will find a list of all the apps installed on your phone
- So, scroll down and tap on the ‘Messaging’ or ‘Messages’ app (the default messaging app) from the list
- Next, tap on the ‘Storage’ option from the next page
- Then, you have to tap on the ‘Clear Cache’ option from the next screen
At this point, the cache memory of the default messaging app on your phone will be cleared. If you are lucky, the problem with the ‘Message Not Found’ error code will disappear.
Method #4 Delete Some Messages
Another straightforward solution could be to delete some messages from your phone. Why? Because if you are using an old-school android phone, then it is possible that the phone stores the received messages on the phone memory.
And, if the phone memory becomes full, then no new text messages will be able to reach your phone. In this case, you can delete some messages from your phone.
To be safe, delete the unnecessary messages that were received from your service provider or spammers. After you have deleted all the unnecessary messages and cleared some memory on your device, you should notice that the ‘message not found’ issue has disappeared.
In addition, you can also delete some files like unnecessary images, audio, or videos from the phone to retrieve some storage space.
Method #5 Force Reboot Your Phone
In the first method, we have taught you how to restart your phone. However, sometimes, only restarting your phone doesn’t solve the problem. In this case, you might have to force restart your phone.
How does it work? Interestingly, it is almost similar to a normal restart. Here are the steps…
Steps to Follow
- Press and hold the ‘Power’ button until the phone turns off and restarts
- You can also turn off your phone and then restart it after 30 seconds
Method #6 Factory Reset Your Phone
The next solution to the problem is to factory reset your phone. As usual, the process of resetting a phone to its factory settings will be different based on the model and the current software version it is running on.
As a result, it is not that easy to share the method of factory resetting every android phone out there.
However, we will share a common method with many similarities with most android devices. But before you proceed to factory reset your phone, you must understand that it will delete most files and data from your phone.
As a result, you should take a backup of the important data on your phone before resetting the phone to its factory settings.
We will assume that you have taken a backup of the files. And, we want to tell you that if you have damaged your phone in any way in the process, Android Tipster is not responsible anyway. You should follow the steps below at your own responsibility.
So, let’s get to it…
Steps to Follow
- Now, navigate to the Settings menu on your android phone
- Next, you have to go to the ‘System’ option
- Then you need to tap on the ‘Reset’ option
- If you don’t find these options on your phone, you can type ‘Reset’ on the search box of the settings menu and search for it. Then from the search results, you should go to the ‘Reset’ or ‘Factory Reset’ option.
- Next, you will find a few options, namely ‘Reset all settings’, ‘Reset network settings, and ‘Reset phone.’
- If you think the problem is with your network settings, tap on the ‘Reset network settings’ and follow the next instructions on the screen.
- And, if that didn’t solve the problem, you should tap on the ‘Reset phone option from there.
- At this point, you will be given a warning about the deletion of all of your app settings and files. Still, you have to scroll down and tap on the ‘Reset Phone option.
- A warning message will appear on a popup window. But you need to tap on the ‘Yes’, or ‘Done’, or ‘Reset’ option from there to finalize the process.
- Now, wait a bit. After the resetting process is complete, your phone will restart on its own
So now you can check whether the problem with the ‘Unknown Sender Message’ error is still there or not. And restore all the settings and files you have taken a backup of before the factory reset procedure.
Method #7 Problem with the SIM card tray
So, you have tried all the fixes mentioned above. Yet, nothing worked? That is really unfortunate. In this case, there is only one solution left. And that is to talk with the customer care center of both your phone and service provider.
Or else, we think the problem is actually because of the SIM card tray or Network IC on your phone. Normally, these are hardware issues. So you should contact the service center as soon as possible.
Or you can also check to see if the SIM card tray is OK or not. Also, there could be problems with the silicone pins on the SIM card or the SIM card tray. So, you should change them if possible.
Wrap Up on “Unknown Sender Message not Found”
You can see that there is no surefire way to know the exact reason behind this messaging error. Still, we have tried to dig deep and find some critical information on this problem.
At the same time, we have also shared several solutions to fix the ‘Unknown Sender Message Not Found’ error.
As we cannot tell you which method is the best and will work for sure, you should try each of them out one by one. And, before you go, you should let us know about the very method that worked for you in the comments below. Plus, please share this post with others.
