The Android operating system is known for its numerous versions. Google tends to release newer versions of the OS each year. And all the smartphone companies have also started to roll out OS updates on their devices. It is always a good idea to update your phone to the latest version of Android as soon as the new update is rolled out. If you want to upgrade Android Ice Cream Sandwich to Jelly Bean, this post is for you.
The Ice Cream Sandwich and the Jelly Bean were 2 of the earlier versions of the Android operating system.
We will share a few methods of upgrading from Ice Cream Sandwich to the Jelly Bean version of the Android operating system. So if you were looking for this, you have come to the right place.
So, let’s get to it…
How to Upgrade from Android Ice Cream Sandwich to Android Jellybean
Before diving into the tutorial, we think we should discuss these particular android OS versions. You can skip this part if you are familiar with these two Android OS versions.
What is Android Ice Cream Sandwich?
Simply put, ‘Android Ice Cream Sandwich’ is the 9th major upgradable version of Android OS. Google released this version of Android OS on October 19, 2011.
The alternative name of the Android Ice Cream Sandwich was the Android 4.0 version. This version was first available on Samsung Galaxy Nexus.
Features of Android Ice Cream Sandwich
Even though this version of Android OS was released 10 years ago, it actually came out with some incredible features.
First, the UI was more geared towards a minimalist and cleaner look. This is the first version of Android OS; Google introduced the Roboto font.
The home screen had a refreshed design. In addition, NFC was also introduced in this version.
The Contacts app was also updated. They have added the ability to integrate social network accounts into each contact. The web browser was also updated.
It was the first Android OS on which you could directly access the Camera app from the lock screen.
Also, you could control music playback directly from the lock screen for the first time. One of the most important features added was the ‘Face Unlock’.
However, this feature received a lot of criticism as it was a bit buggy. Google stopped its official support of this particular android version back in 2018.
According to Google, about 0.2% of Android users accessing the Google Play Store still use the Ice Cream Sandwich.
What is Android Jelly Bean
Google codenamed the 10th version of the Android operating system Jelly Bean. It had 3 major point releases which are Android 4.1 to 4.3.1. As you can guess, the 1st version was Android 4.1 and it was preceded by the Ice Cream Sandwich version. This version was unveiled back in June 2012.
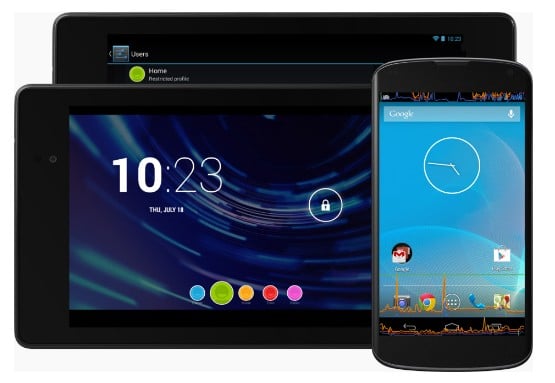
The first smartphone to have Android Jelly Bean was the Nexus 7 from Google itself. Now, Google has officially stopped rolling out updates via the Google Play Services. According to Google, about 0.46% of the devices accessed by the Play Store runs on Android Jelly Bean.
Features of Android Jelly Bean
The Android Jellybean was one of the most popular Android OS versions back in the day. Because it was full of new attractive features.
Google first introduced the Google Chrome browser in Jelly Bean. There were some significant visual upgrades in the UI of Android Jelly Bean.
The notification shade had a redesign. It introduced actionable notifications.
Also, there were action buttons for individual notifications. You could also disable notifications per app. The lock screen on the Jelly Bean also had some minor tweaks.
The Android Jelly Bean also brought Google Assistant to the scene.
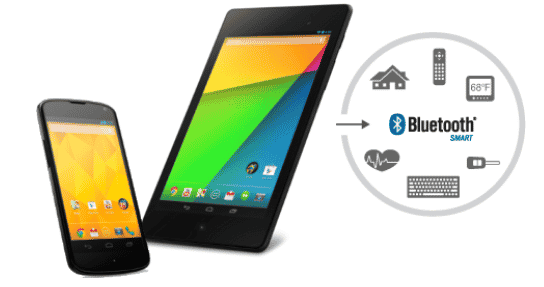
Also, this version of Android had support for gamepads and controllers. It was also the first Android OS version that supported Miracast. Android Jelly Bean also introduced screensavers.
Differences between Android Ice Cream Sandwich vs. Jelly Bean
Although these two Android OS versions are old, they have brought a lot of new features back in the day. This section will discuss some differences between Android Jelly Bean and Ice Cream Sandwich. So let’s begin…
People’s App
Google improved the People’s app on the Jelly Bean version. For your information, the People’s app was the previous name of the Contacts app.
In Jelly Bean, you could add pictures of any contact. In addition, you could also add email addresses, websites, and many more. This was not possible in Ice Cream Sandwich.
User Interface
Google redesigned the UI of the Android Jelly Bean with some attractive visuals.
At first glance, it might seem almost identical to the Ice Cream Sandwich. But you will find more once you dig a little bit deeper. In addition, the UI of Jelly Bean is much faster than the Ice Cream Sandwich.
It is because Android Jelly Bean was running at 60 FPS from the get-go. All icons also got revamped in Android Jelly Bean. Frankly, once you have used this version of Android, you might not even want to go back to the Ice Cream Sandwich.
The Keyboard
Normally, you will not notice much difference while texting on Android Jelly Bean compared to Ice Cream Sandwich.
However, after a few times, you will definitely notice all the new additions. For instance, Google has improved the dictionary and text prediction feature in Jelly Bean.
On top of that, voice dictation typing is also available while offline. So you will not need to be connected to the internet to type messages using your voice.
Settings
There have been several changes in the settings menu of Jelly Bean compared to Ice Cream Sandwich.
First, the ‘Developer Options’ settings are no longer enabled by default. It is now turned off. And you can manually turn this on or off.
Plus, you can swipe from one side to the other side of the screen to change between ‘Downloaded’ to ‘Running’ to the ‘All Apps’ section.
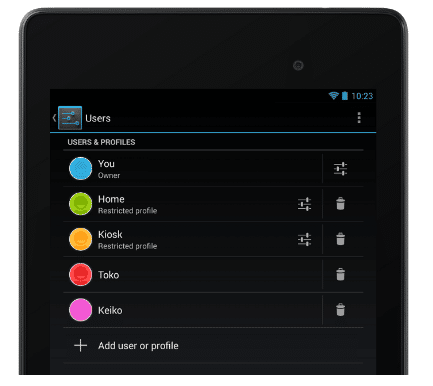
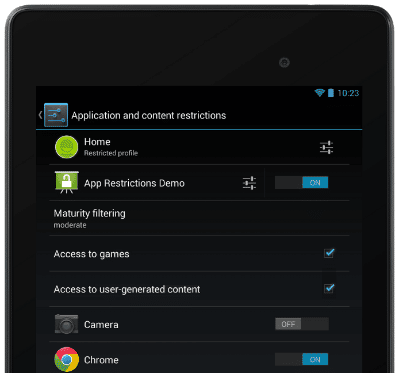
You can also customize notification settings for each app individually. This wasn’t possible in Android Jelly Bean.
Notification Drawer
The notification shade has been improved in Android Jelly Bean. From now on, you can take various actions directly from notifications from the notification drawer.
That means it will not take you to the particular app anymore. Also, the clock is a bit bigger in size, and once you have taken a screenshot, you can share it directly from the notification.
Widgets
In Android Jelly Bean, all the widgets are resizable. Also, the apps’ icons will rearrange automatically if you add or remove icons from the home screen. This was not available on Ice Cream Sandwich.
App Management and Apps
Google has updated several default apps in Android Jelly Bean. Also, the multitasking and Recent app menu are faster and smoother than the Android Ice Cream Sandwich.
Google Play Store Updates
In Android Ice Cream Sandwich, you would have to download the full app once you would to update it. But fortunately, from Android Jelly Bean, people would need to only download the newly updated files, not the whole app.
The Search Function
Good had dramatically improved the overall search function in Android Jelly Bean. The search function became more powerful from this update.
Also, they have updated the UI of the search app. Instead of normal PC-like search results, Google introduced ‘cards’ in Jelly Bean.
However, you could always go back to the normal look from the settings. Also, there was a huge improvement in Google Now and voice-based assistants.
The Camera App
The default Camera app on the Android Jelly Bean is faster and more responsive compared to the Android Ice Cream Sandwich.
Also, you can access the Gallery directly from the Camera app on Jelly Bean. You can also delete, edit, or share any photos from there.
Overall, it is clear that Android Jelly Bean is superior to Ice Cream Sandwich in many ways. So you might be eager to try out Android Jelly Bean. If that is the case, then the next section is what you are looking for.
Methods of Upgrading from Android Ice Cream Sandwich to Jellybean
You can follow many ways to upgrade from Android Ice Cream Sandwich to Jelly Bean. And we will try to share most of the effective ways in this section for you. So let’s go.
OTA Method
This is the easiest way to upgrade your phone running on Android Ice Cream Sandwich. Because it is the official way to do so. Of course, it is not available to every user. In that case, we will show you other methods as well.
In this method, your phone will automatically receive a software update and you will have to download and install it. Here’s how to do it.
Steps to Follow
- First of all, you have to have an active data connection
- Next, you should go to the Settings menu
- Then scroll down and tap on the About or About Phone option
- Next, you need to tap on the Software Updates option
- After that, you have to tap on the Check Now option
- In this stage, your phone will search for any new software updates
- Once it finds the new Android Jelly Bean update, you have to tap on the Download button
- Now, wait till the update is downloaded on your phone
- After the update is downloaded, you need to tap on the Install button and your phone will install the new update automatically
- Your phone will also restart at this moment. So it is better if it has about 60% charge
Remember, depending on your phone brand; a few options might have different names on the aforementioned steps. But if you have followed the steps above, you can figure it out independently. Also, this is the safest method as you don’t have to root your device.
Flashing Custom ROM
If you could not successfully update from Android Ice Cream Sandwich to Jellybean following the last method, we have more methods for you. However, before we begin, we must tell you this is an advanced method.
You will have to root your device and install a custom ROM in this method. It is not that complicated.
However, if you are a beginner, you should not try this as one wrong step could damage or brick your phone. Also, the method would differ depending on the phone model.
Upgrading from Android Ice Cream Sandwich to Jellybean on the Asus Transformer TF101 Android tablet
For your information, this method is for the Asus Transformer TF101 Android tablet users. So if you are using other devices, then you should not skip this one. So let’s begin.
Remark: Rooting your device and installing a custom ROM will void your warranty. Also, one wrong step, and it might brick or damage your device. Androidtipster will not be responsible if this method damages or bricks your device.
Steps to Follow
#1 APX Mode
First, you will have to put your Asus Transformer TF101 Android tablet into APX mode. To do this, you will need to press and hold the Power and Volume Up buttons at the same time for a few seconds. Then you will notice that the device is turned off.
However, now you should plug your tablet into your Windows PC using a data cable. And you will find on your PC that a new device has been connected. Also, your PC will try to install drivers for your tablet automatically.
On the other hand, if your PC couldn’t automatically download and install the driver, then you should download PDAnet manually on your PC.
Then install PDAnet on your PC. With this installed on your PC, then your PC will correctly install your drivers.
If you don’t want to do that, or you were unsuccessful, then you should download the particular driver for your tablet from the list of the universal driver package.
Remember, you should not use both these files to install the correct drivers. Use either PDAnet or the universal driver package.
#2 Install Custom Recovery
Now, we will install custom recovery on your device. There are many ways to do that. However, we will share one of the easiest ways to install custom recovery on your tablet.
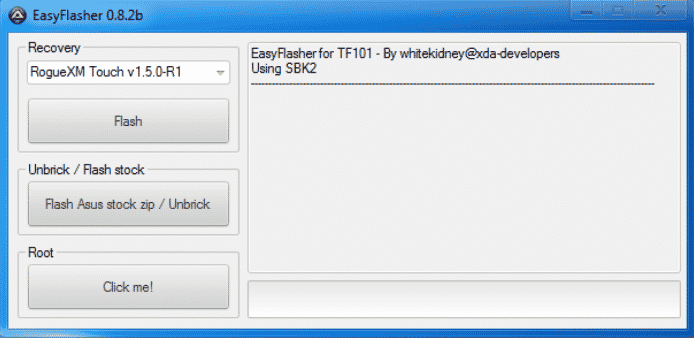
First of all, you will need to download and install EasyFlasher on your PC.
Once you have installed EasyFlasher on your PC, you must install a custom recovery of your choice on your phone.
We recommend downloading TWRP custom recovery; you can download the particular version compatible with your device.
Then you have to download any Jelly Bean ROM of your choice that you want to use on your tablet. For your convenience, you can download this ROM which is a good one. So download this Jelly Bean ROM on your phone’s storage.
Then you have to reboot into recovery mode. To do that, you will have to turn off your phone and now reboot your phone by pressing and holding the Power and Volume Down buttons simultaneously until you see that the phone has turned on.
Next, follow the instructions on the screen to enter into the custom recovery. Usually, you would need to press the Volume Up or down button and the Power button to enter the recovery mode.
Next, select flash .zip. Next, you will have to navigate to the folder you have kept the Jelly Bean ROM on your device. Then you need to click on it and install it.
Remember, you should keep at least 60% battery power when doing this. Now, wait until your phone installs the new custom Jelly Bean ROM. After that, your tablet will restart and you will need to set up it.
If you want to root your device, then you can run EasyFlasher on your PC. Next, you must put your tablet on APX mode and connect to your PC. Once the device is recognized by your PC. You just need to click on
Then you have to click on the ‘Click Me!’ button under the Root section on EasyFlasher. Now, wait a bit, and your device will be rooted. And you have a rooted android tablet that is running on Android Jelly Bean.
We have mentioned upgrading your Asus TF101 tablet from Android Ice Cream Sandwich to Jelly Bean.
However, you can also follow the same method to install custom ROMs on any other devices. But remember, you will have to use the correct files to do so. Using incompatible ROMs will damage your device.
Final Lines
Android Jelly Bean is a better choice than Ice Cream Sandwich.
So if you have followed our instructions above and upgraded your android device to Jelly Bean, you are good to go. We must admit that the abovementioned methods are not easy to follow.
So if you don’t know what you are doing, you should not follow the instructions. Cause you might damage your device.
Anyways, we hope this post was helpful. In that case, you can share it with others. And if you have any questions or suggestions, you can let us know in the comments below.


