Some of our readers have reported that they are getting a temporary network setup error on their phones. And they can’t fix this issue at all. Sometimes it goes away itself. However, it comes back once again after a while automatically. So it has become a chore for some android users out there.
As a result, we went ahead and tried to make sense of this problem. Along with that, we have also found some possible solutions to this. For your convenience, we have put together this post with all the methods you can try to fix this problem.
So without wasting more words, let’s get to it…
How to Fix Temporary Network Setup Error on Android
Reportedly, only Sprint SIM users are facing this error. So if you are one of them then this problem might be occurring because of your SIM card. On the other hand, there could be other reasons pertaining to this network error. In this section, we will talk about some of the reasons and solutions to this problem.
Method #1 Problem with the SIM Card
First of all, we will discuss the SIM card issue. Many of the users have found out that the source of the problem is actually their SIM card. If that is the case for you, then you can try the solutions mentioned below.
Solutions
#1 Try Reseating the SIM Card
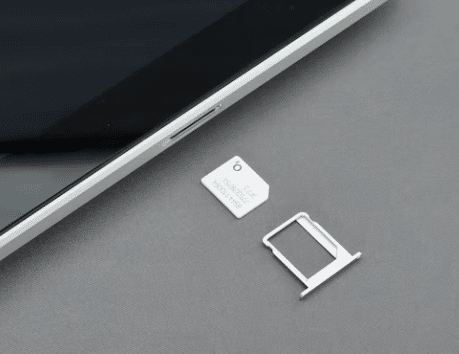
The sim card on your phone must be seated perfectly to work properly. If it is not in its appropriate place, then you might face temporary network issues. So you should remove the SIM card and make sure you have inserted it properly this time.
After inserting the SIM properly, check back to see if the problem still exists.
#2 Try another SIM Card
If you have tried to follow the above-mentioned solution and found out that the problem is still there. Then it is possible that the problem is with your particular SIM card. So you should replace the SIM card with another one.
If the problem goes away, then you can be sure that your SIM card was the source of the issue. So you need to permanently replace that SIM card to solve the issue.
#3 Replace the SIM Card
If you have found out that your current SIM card is not working properly. If the source of the ‘temporary network setup’ error is the SIM card, then you should replace the SIM card with a newer one. This should fix the error.
#4 Repair the SIM Card Tray
If you have tried the solutions mentioned above and still facing the error, then it could be that the SIM card tray is damaged. When the sim card tray is damaged, you are bound to face network issues. Depending on the model of your phone, the sim card tray design would be different.
So the best way to check if it is damaged or not, you should remove the SIM card and the tray to inspect it yourself. If you see that some parts are damaged then you should buy a new sim card tray.
Or else, you can take it to a repair shop and fix it there. After fixing the SIM card tray, you should check whether the error is still there or not.
#5 Repair the Network IC
Another reason for the network setup error could be the network IC. This particular hardware is found side the phone. It handles all the network-related activities on your phone. As it is a hardware-related thing, you will not be able to fix or troubleshoot it on your own.
Rather, your best bet would be to take it to a repair shop and let them check if the network IC is ok on your phone or not. If the problem is not your network IC, then you should try the other solutions mentioned here.
Method #2 Restart the Phone
It might sound obvious. However, restarting your phone can actually solve a lot of issues. So before trying more advanced solutions, you should restart your phone at least once. If you are lucky it might solve the issue on its own. However, if restarting your phone hasn’t solved the issue, then you should try other solutions.
Method #3 Reset the Network Settings
On Android, you can reset the network settings separately without factory resetting your phone. However, once you reset the network settings, you will need to reconnect your Wi-Fi, Bluetooth, and other wireless network-related connections.
That means all the previously Bluetooth-paired devices would be unpaired. And all the saved Wi-Fi networks would be forgotten as well. So you will have to reconnect and repair everything. Here’s how to reset the network settings on Android devices.
Steps to Follow
- First of all, you need to go to the Settings menu on your phone
- Next, you should look for the System Settings option. You might have to scroll down a bit to find that
- After that, you will have to go to the Backup and reset option
- From there you will have to tap on the Reset Phone option
- Next, you need to tap on the Reset network settings option
- After that, you will be prompted to enter your PIN/Pass/or fingerprint to confirm the operation. So do that accordingly
- If you have done that your phone’s network settings will be reset to the factory settings
- For the record, if you are not finding these settings on your phone, then you should search on the Settings menu for Reset Network Settings and you should find that setting
Once you have reset the network settings, then you should check whether the error is still there or not. Also, you will have to reconnect and repair all of your wireless devices after the network reset.
Method #4 Contact the Customer Support Team of Your SIM Card
Typically, the ‘network setup error’ is actually associated with your SIM card. It is very much possible that your SIM card company is at fault for this problem. So you should contact them if nothing seems to solve your issue.
You can call them or you can visit their help center directly. Simply, let them know about the problem you are facing and they will help you. It is very much likely they will replace the SIM card and the problem should go away. So it is worth a shot to contact the customer support team of your SIM card.
Method #5 Format the Phone
Another probable solution to this problem is to format your phone to the factory settings. However, you should do this only as a last resort. Because once you have reset your phone to the factory settings, all the data will be deleted from your phone.
So even if you have decided to format your phone, then you must take a backup of the file of your phone prior to the factory reset. If you have taken the backup then you can follow the steps mentioned below to format your android phone to the factory settings.
Steps to Follow
- As usual, you need to go to the Settings menu on your android phone
- Next, you need to go to the System Settings option. You will have to scroll down a bit
- Now, you will have to tap on the Backup and reset option. You can actually take backup using this option if you want to as well
- Next, you need to tap on the Reset phone option
- After that, you will have to tap on the Reset everything/Erase everything option
- It will ask you to enter your PIN/password/fingerprint to confirm the command. So enter the valid pass/PIN to continue formatting your phone
- You will have to wait a few minutes for the whole process to take place. Your phone will restart automatically once the formatting is done
- And you will need to set up the phone once again as it will return to its factory settings
For some of you, the steps or options above might not be similar. In your case, you can search for ‘Reset phone’ on the search bar of the settings menu. And you will be able to get the Reset everything option. From there, you will be able to perform the factory reset on your android phone.
Method #6 Change the Carrier
If you have tried another SIM card from a different carrier on your phone. And if that SIM worked without any errors, then this looks like the problem is on your current SIM card. So you should change the carrier.
For instance, if you are using Sprint and facing the issue. However, if you have tried Verizon and saw that it works without any problem, then the problem is with Sprint. So you should migrate to another SIM card company that doesn’t have that issue.
Sum Up
If you have read the post above, now you know the root cause of the network setup error issue. In addition, you also have a detailed idea of how to solve the problem on your own. We have shared multiple methods on how to do that.
So we hope at least one of those methods will come in handy for you. If you have found this post helpful, then don’t forget to share it with others. And if you have any further questions or suggestions, you can leave them in the comments below!


