Free Amazon VPS for a year
I’m frequently asked by a lot of users who do not own a Windows computer if there’s a way they could run Jarvee on their Mac computers as it would not be feasible for some to acquire a new Windows computer for the sole purpose of running a social media automation software.
This tutorial is meant for both:
- Mac users who want to automate their social media accounts on Jarvee (which supports only Windows) and
- Windows users who wish to have the automation tool run 24/7 without them having to leave their computer running.
PS: If you need a powerful VPS for cheap, reach me on Skype Diablo2562 and I’ll connect you to a reliable provider I currently use.
In this tutorial, we’re going to set up a FREE VPS (Virtual Private Server) – which essentially is a computer that runs online and continues to even after you switch off your computer.
You’re going to find this especially useful if you don’t usually have the time to grow your social media accounts and have had to source the services of companies that manage social media accounts for you and thus you’re going to be saving A LOT OF MONEY. Just in case you didn’t know, these companies charge an average of $250/month just to help grow a single account of yours, and now you too can do it all by yourself and could even start offering the same services.
Amazon offers a free VPS for 1 year but most people haven’t been able to make use of this opportunity because there aren’t enough detailed tutorials out there to show them how to set it up.
1 year is more than enough for us to be able to grow our accounts’ following enough for us to stop automating. Personally, I prefer to pull my accounts off of social media automation tools once they cross the 20,000 mark, and result to growing them manually if I don’t wish to sell the accounts.
Anyone can reach a following of 20,000 fairly quickly if they take the right steps, all of which you’ll be able to learn by reading a few of the articles I’ve published on this website.
Enough of the talk and now let’s get back to setting up our VPS.
What you’ll need:
- A credit card (don’t worry you’ll be able to cancel it at the end of 1 year and won’t be billed. After all, Amazon is a trusted company).
- A telephone number – meant for verification purposes.
- A few minutes of your time
The free VPS you’re going to get will be sufficient to run about 10 accounts but if you wish to run a lot more than that, I’d recommend that you go for more powerful premium VPS’ which of course, will cost you some, albeit not much depending on the number of accounts you will be running.
Creating your free Amazon Web Services account
Remember you’re going to do this ONLY ONCE and once everything is set up correctly, you will be able to be logging into the VPS and see how your accounts are progressing.

To get started,
- head over to http://aws.amazon.com/free/ (if you get a 404 error, click on ‘Complete Sign Up’ top right) and click on the button that says Create a Free Account.

- Fill in all required details and hit Continue.

- The Contact Information page will open where you will select Personal and then you’ll fill the form provided and then click on Create Account and Continue.

- You’ll fill up all the details and click Secure Submit. Rember they’re not going to bill you.

- Here, you’ll type in the security code and click Call Me Now. You’ll receive an automated message where you’ll be required to enter the numbers provided on your screen and once successfully verified you see the message below:

- The Select a Support Plan page will open where you’ll only need to click on Free.

Congratulations! You’ve just completed creating your Amazon Web Services account and are now about to start setting it up.

You should receive an email notifying you that your account is ready.
Setting up your free VPS
Now sign in to the console with the email and password you created the account with at the very beginning and follow the steps below:

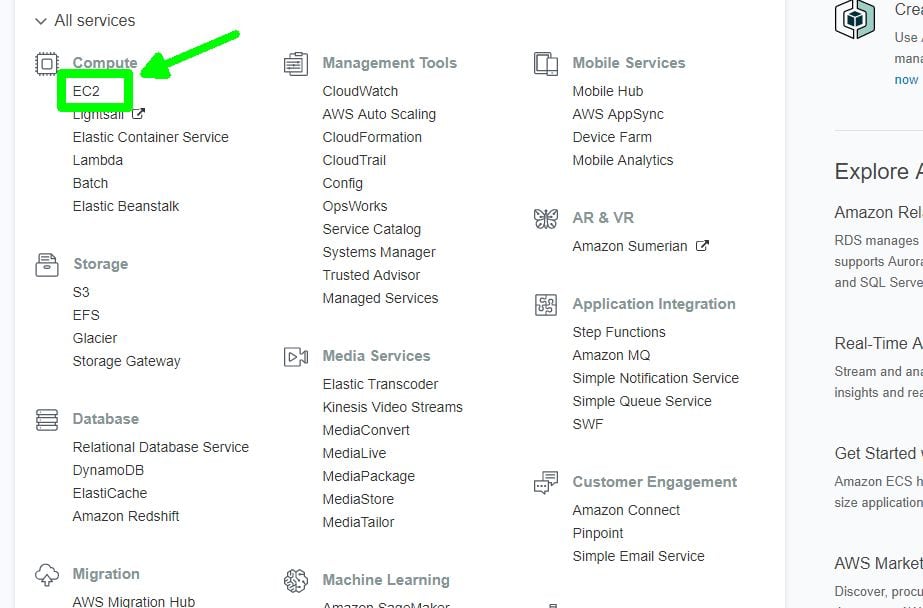
- Click on All services to reveal all available services. Don’t get intimidated by the number of services displayed on there as we’ll only be needing only one of them to be able to set up our VPS. Remember, you’re only gonna need to do this ONLY ONCE and won’t need to go through this process again once the setup is complete!
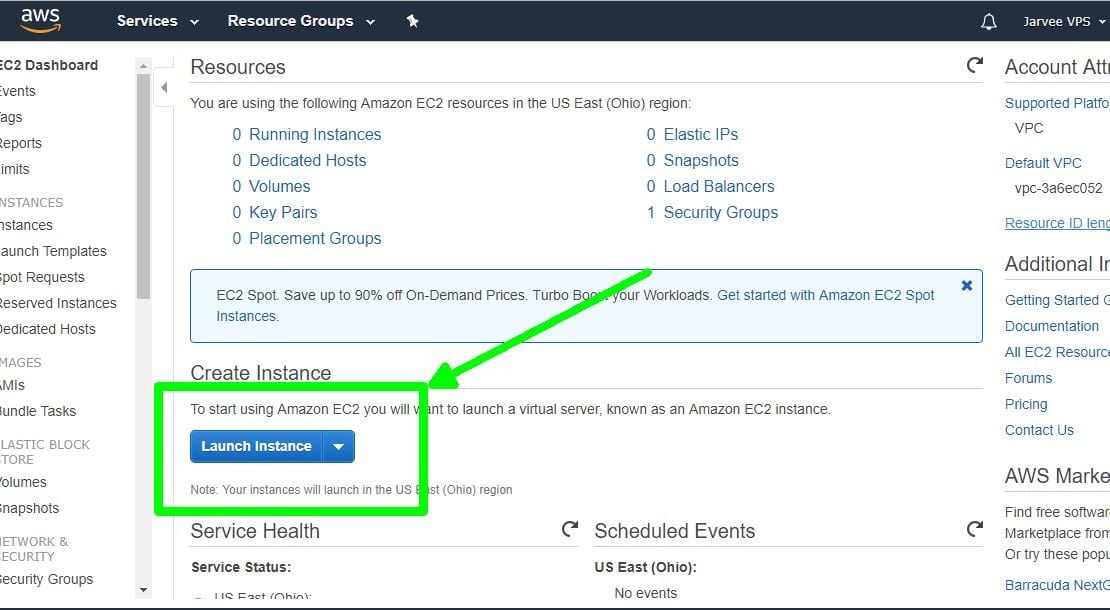
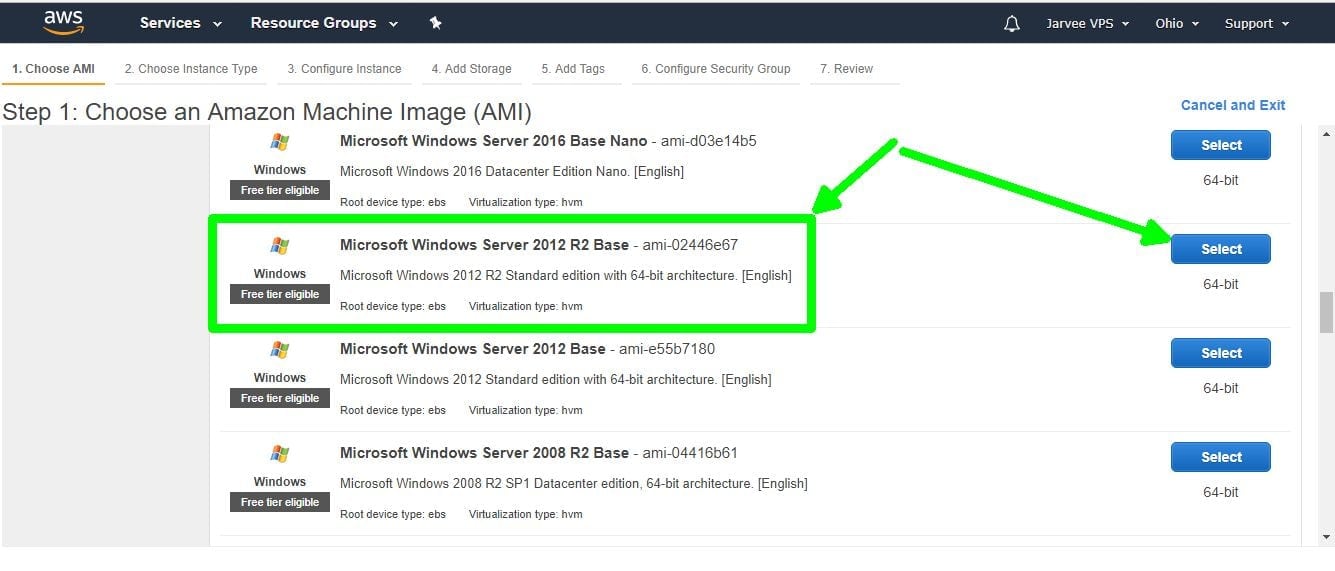
- The Resources page will open. Click on Launch Instance (blue button) to proceed. You will then be directed to a page where you’ll choose what operating system you want to install on your VPS
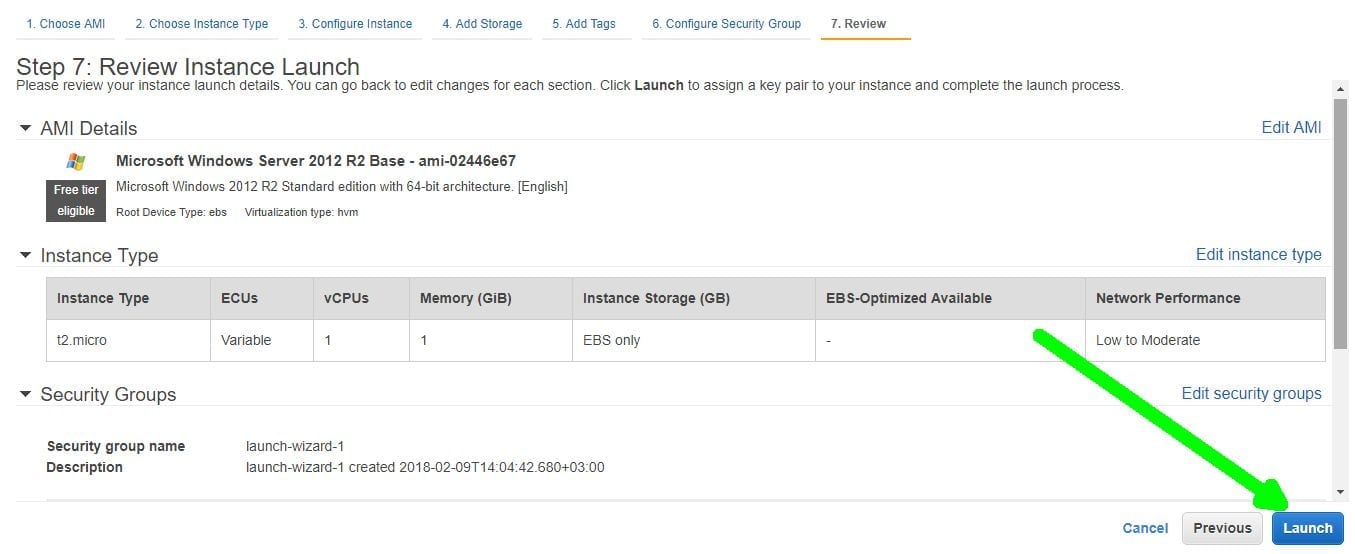
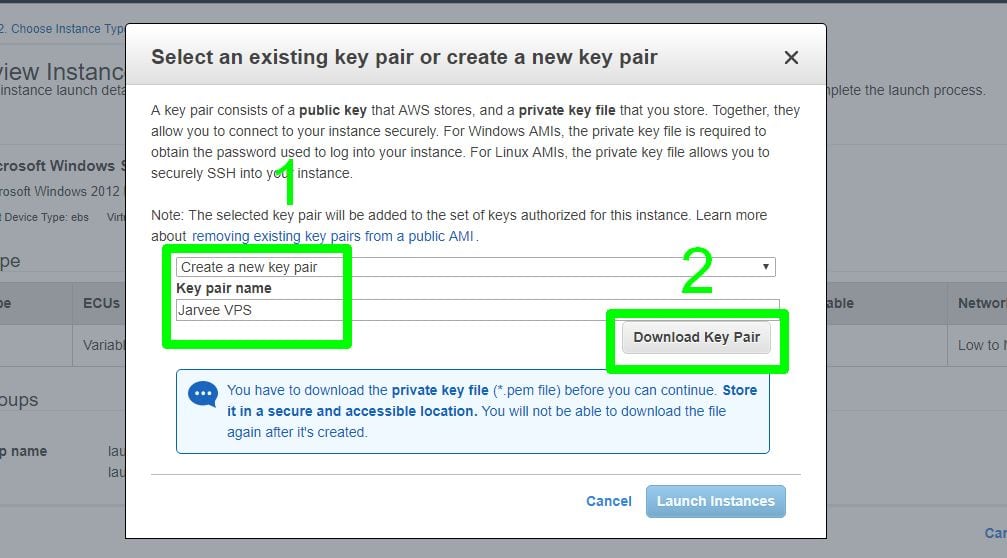
- After you’ve completed downloading your key pair, the blue Launch Instances button should be activated and you should now click on it to proceed.
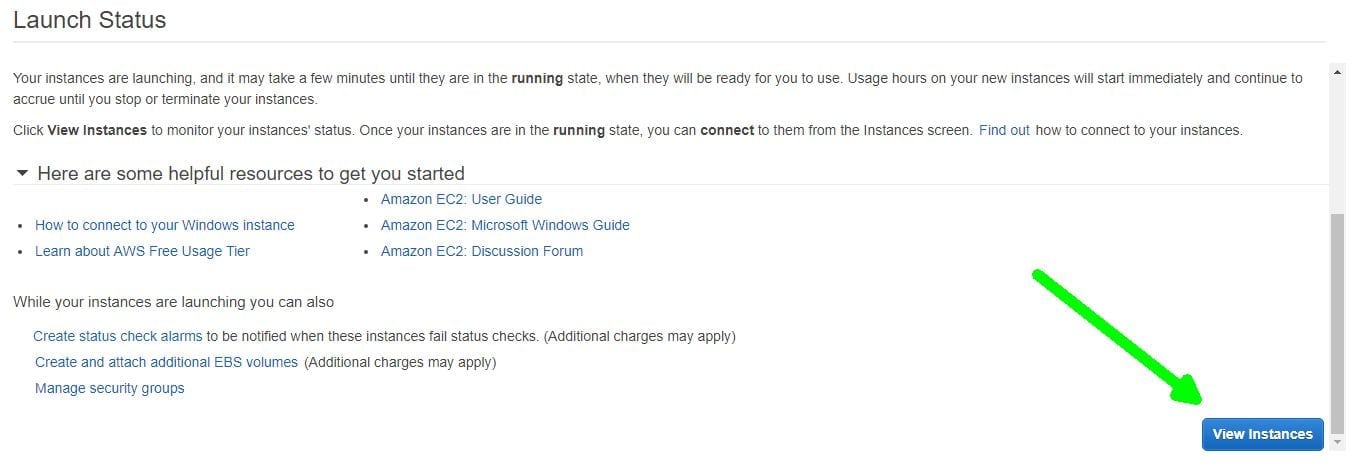
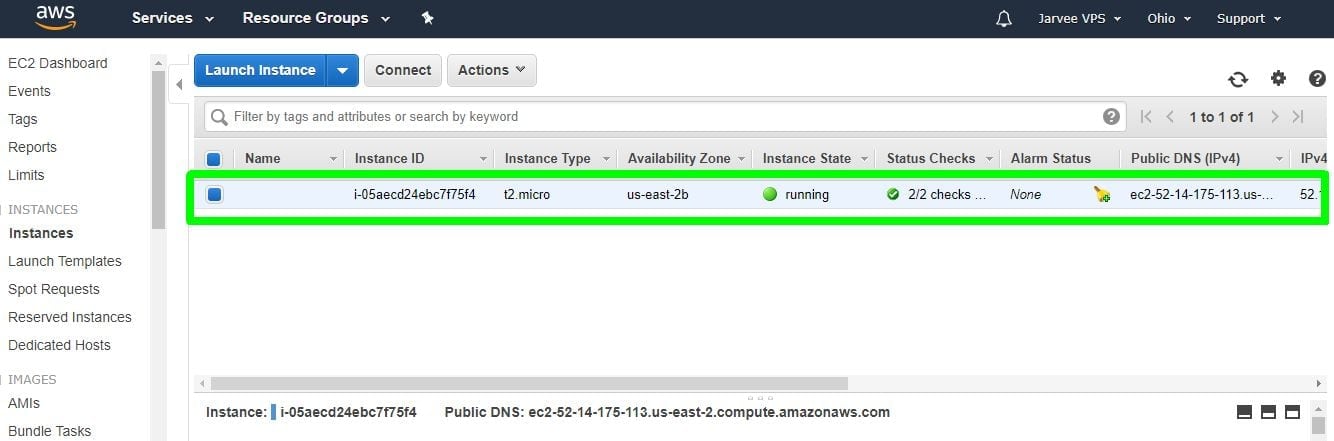
- Click Connect. A window that says Connect To Your Instance will pop up.
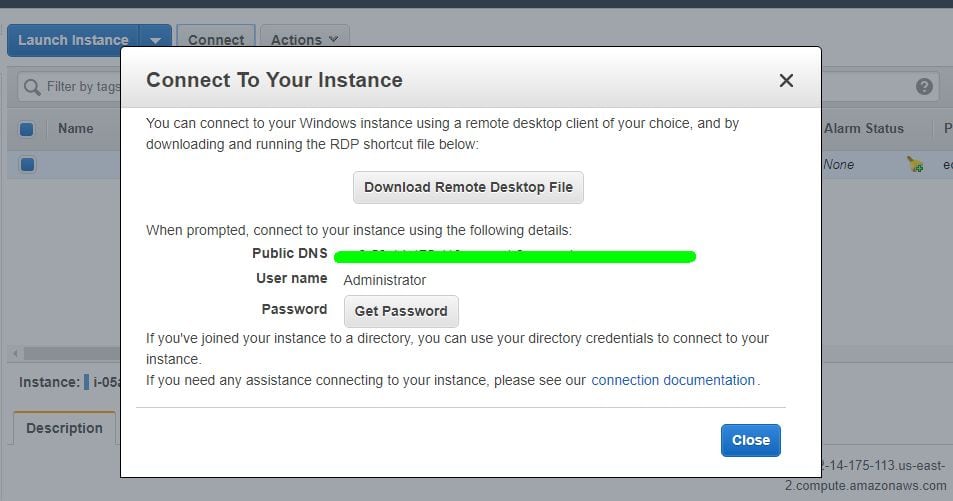
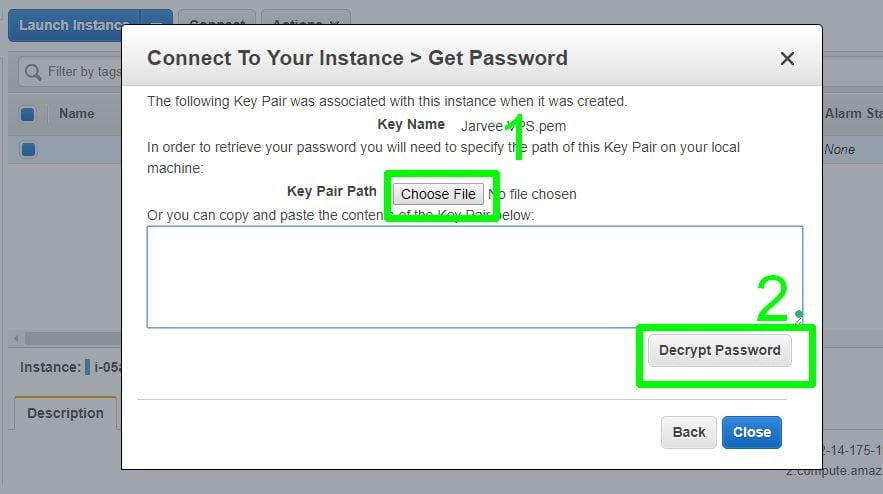
- Your VPS password will be displayed and you should copy and store it somewhere as you’ll be needing it to log into your VPS. You can then close the window.


Guess what!?
Your free Windows VPS is READY and will be running 24/7 for a WHOLE YEAR from now!
You now have your .rdp file (step 8.) which you will be using to connect to it and you also have your password.

Personally, for ease of access, I created a folder and named it appropriately and then I saved all the files in there.
From here on, I’m going to show you how you will now be connecting to your VPS from your Mac or Windows computer (I only have to double-click once whenever I want to connect to my VPS).
Let’s start off with the Windows PC.
How to connect to your VPS using remote desktop from your Windows PC
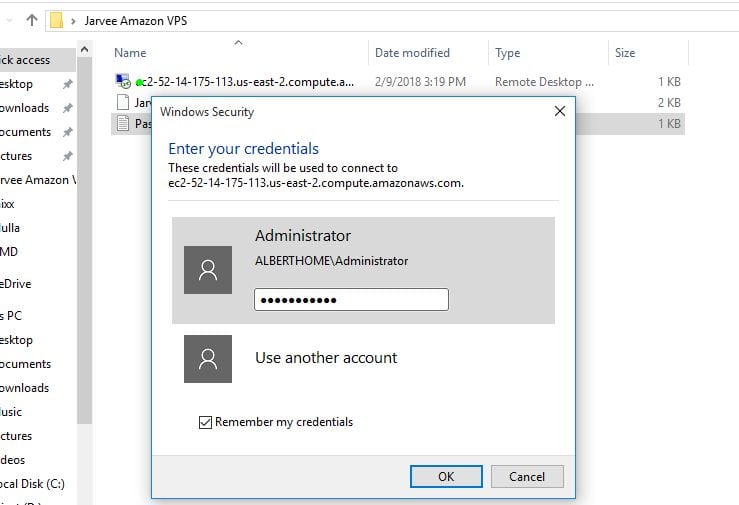
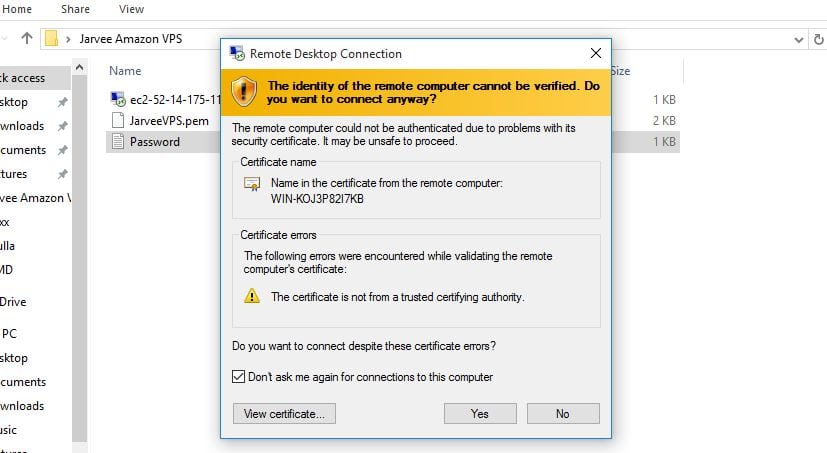
- Double-click on the .rdp file you downloaded in step 8.

- Since this is your first time opening this file, the dialog window shown above will pop up. Make sure to check Don’t ask me again for connections to this computer so you won’t need to do this every time. Now click on Connect.


You’re now logged into your new VPS and you can now copy Jarvee’s installation file link that you received in the email when you registered for Jarvee, open the browser on your VPS and go on to download your copy of Jarvee.
You’re set but just in case you need some assistance kindly refer to this post on how to set up Jarvee on your PC for the first time.
And that’s it for Windows users!
How to connect to your VPS using remote desktop from your Mac Computer
On the Mac OS, logging in to your VPS will be slightly different. First:
- Install a remote desktop connection client, I installed Microsoft Remote Desktop which is easy to use and it’s free (you can find it in the App Store). It should look like:

- After you install the application you need to create your connection. You have the .rdp file at hand and so you don’t need to waste time setting everything up manually, just import it using the “Import” option in the menu bar:

- In case you did not have the .rdp file, you’ll have to manually create your connection, by entering the ip address of your VPS, the username, and password as shown below:

- As long as we’re on this screen let’s make a few more tweaks too. If you imported the .rdp file, edit the imported connection and make sure you add the password (so you don’t have to enter it every time you connect) and choose the optimal resolution depending on your screen. Make sure to save everything and you are done setting everything up. Once the configuration is done, you just have to double click on your newly created connection and you can start setting up Jarvee.


)