Edit: Mass Planner is NOT available anymore but this tutorial works for JARVEE, an advanced automation tool that can automate on several social media platforms.
If you’re wondering what Mass Planner Instagram settings are safe for your account, this tutorial is meant to help you set up your account safely using the same settings that I start with for every account.
I’m assuming you have already downloaded and installed your copy of Mass Planner. In this tutorial we’re going to cover the following 2 instances:
- You’re looking to run less than six Instagram accounts and are running Mass Planner on your PC …. or
- You’re looking to run unlimited Instagram accounts on Mass Planner installed on your PC or a VPS in which case you’re going to need proxies.
PS: Need help setting up your Instagram account on Mass Planner? I can help you with that. Find me on Skype (@diablo2562) and I’ll take you through it via Teamviewer (Free version). Just make sure to have Mass Planner already installed on your computer to save on time.
The following bonus information is included in this tutorial:
- Finding target accounts
- Increasing conversion/follow-back rate/
- Finding hashtags
So let’s jump right in.
Tutorial 1: Setting up your Instagram accounts (less than 6) on Mass Planner installed on your PC – No need for proxies.
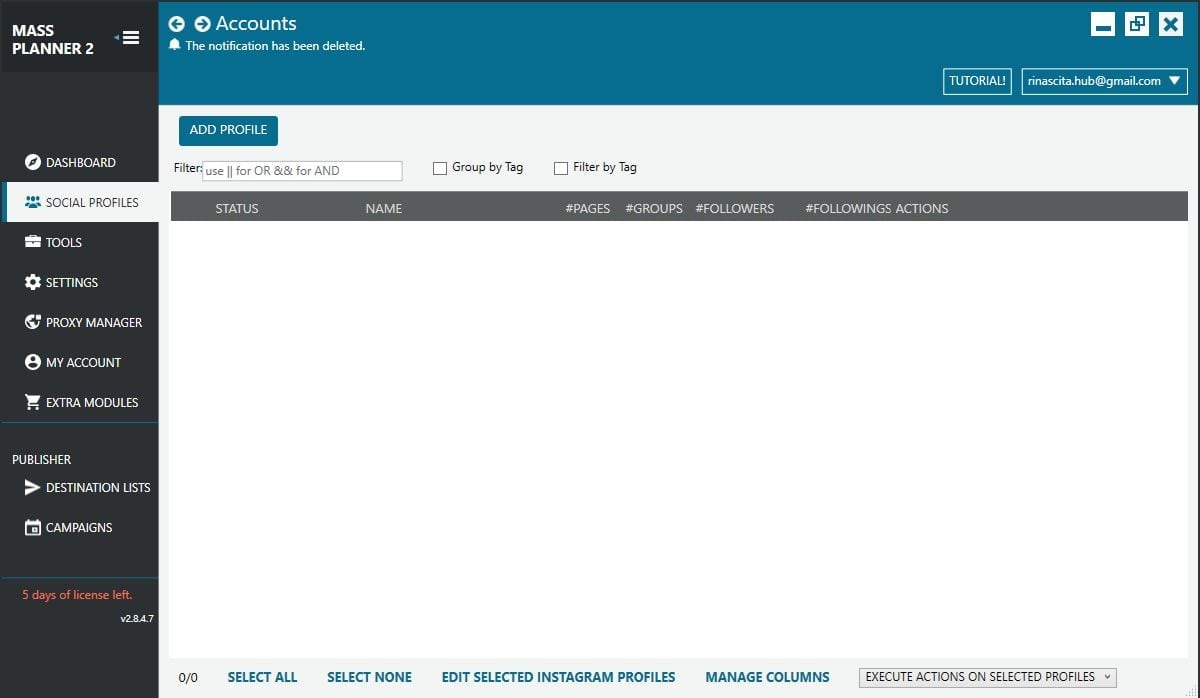
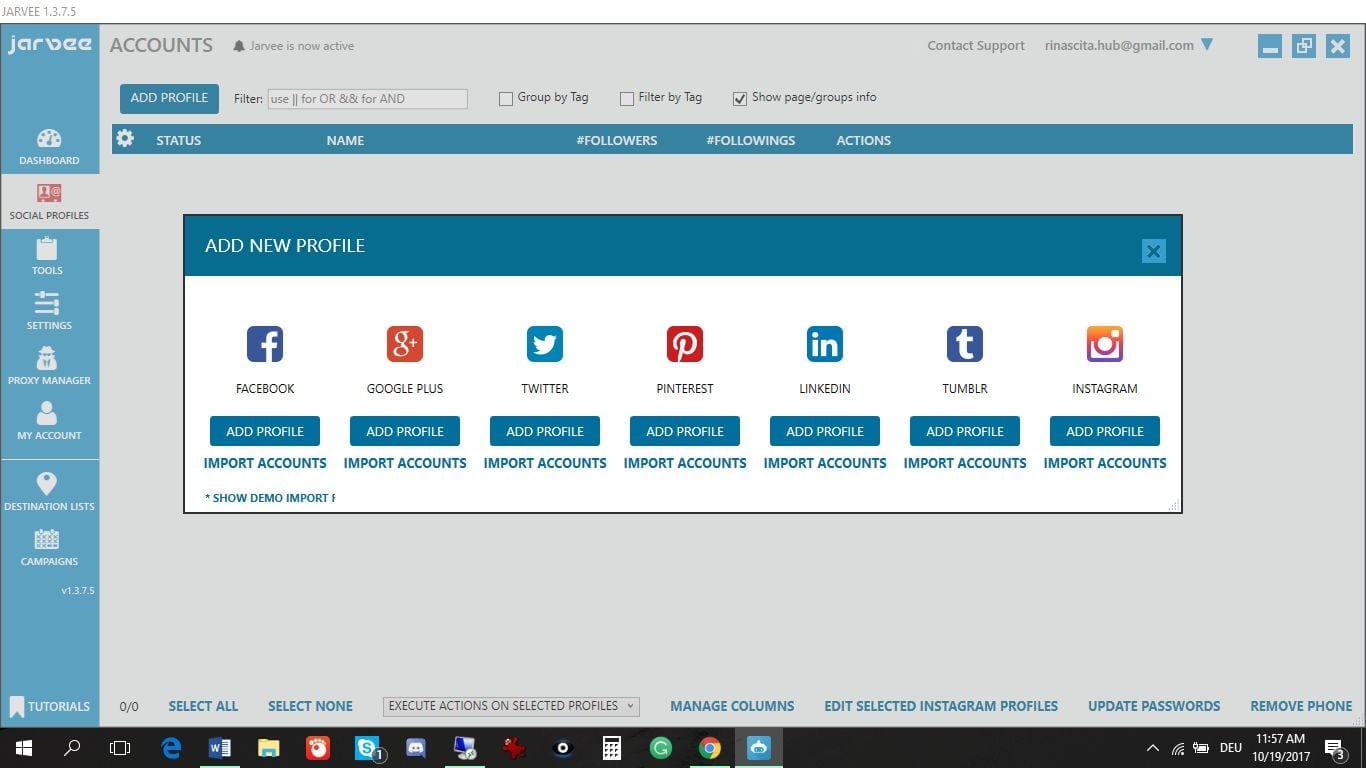
Go to SOCIAL PROFILES and the then click on ADD PROFILE. As of writing this tutorial, you’ll notice that Mass Planner can automate on several platforms, namely: Facebook, Google Plus, automate on Twitter, Pinterest, Linkedin, Instagram, Tumblr and even Email. 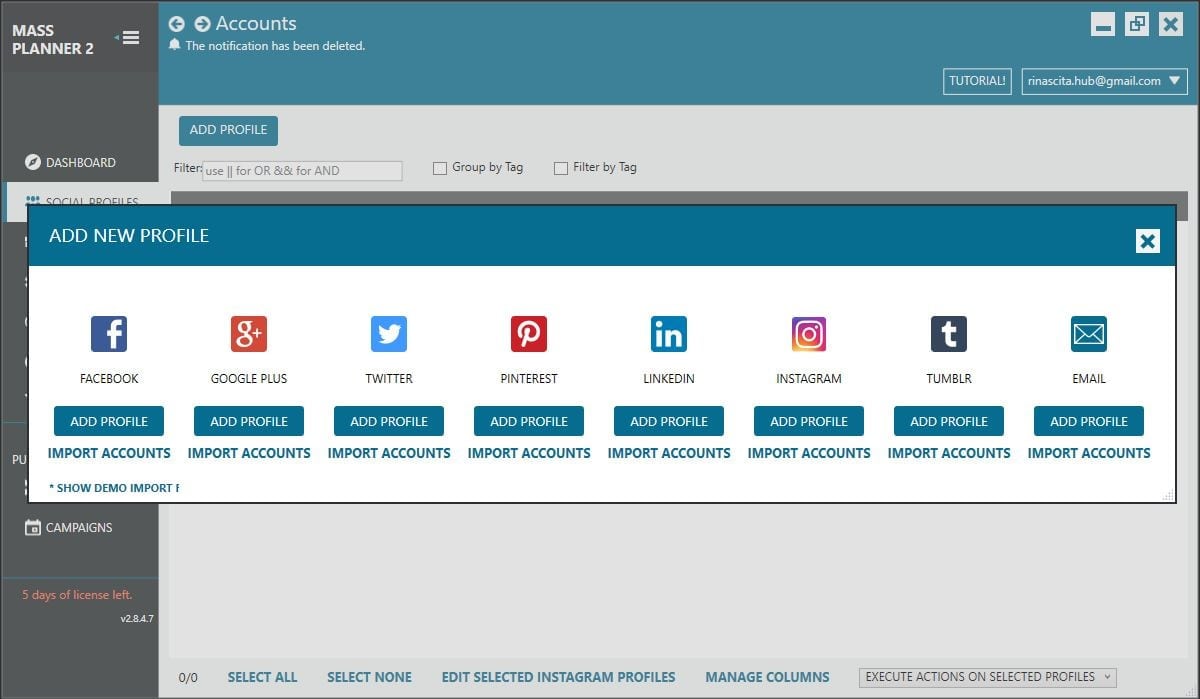
We’ll limit ourselves to Instagram settings for this tutorial so please proceed by selecting ADD PROFILE under Instagram. 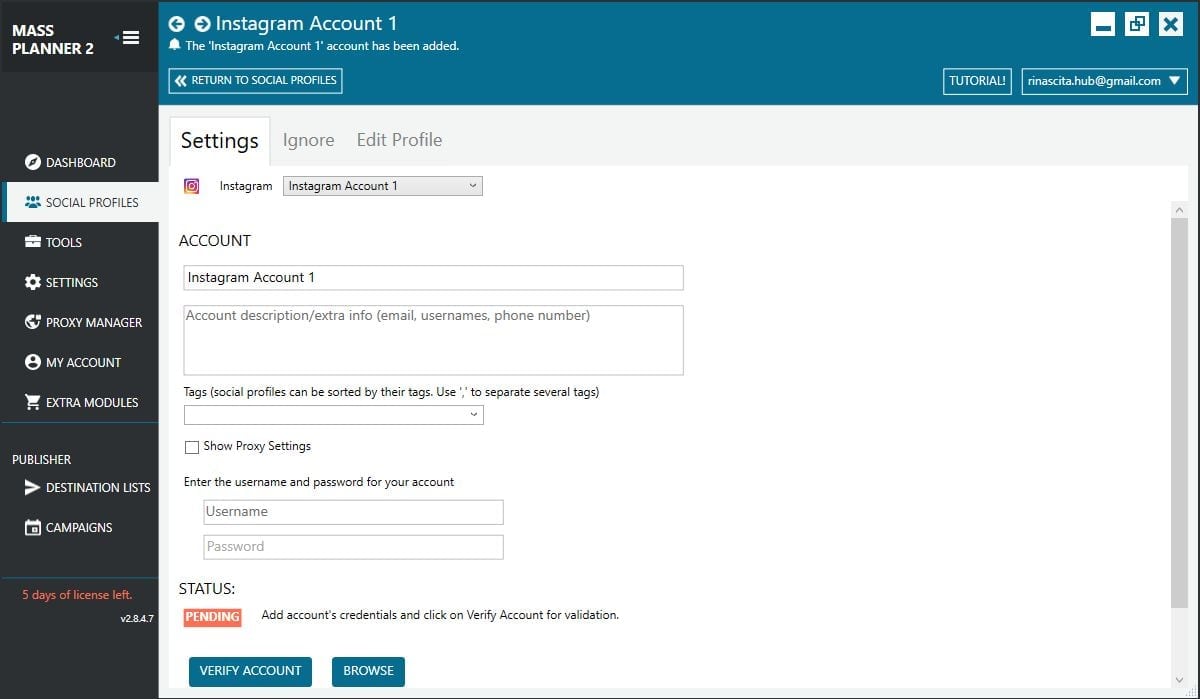
Adding your Instagram account on Mass Planner is so simple. All you need to do is type in your Instagram username and password and hit VERIFY ACCOUNT. There’s an option for proxy but we won’t be needing that unless we’re going to be running Mass Planner on a VPS or if we’re planning to run more than 6 accounts. This is because Mass Planner will be running on our own IP address (the one your PC is on).
If you’re planning to run more than one Instagram accounts, it is advisable to put a unique name where it says ‘Instagram Account 1‘ for each account in order to make it easy to identify each account from a list of all the accounts you’re running. 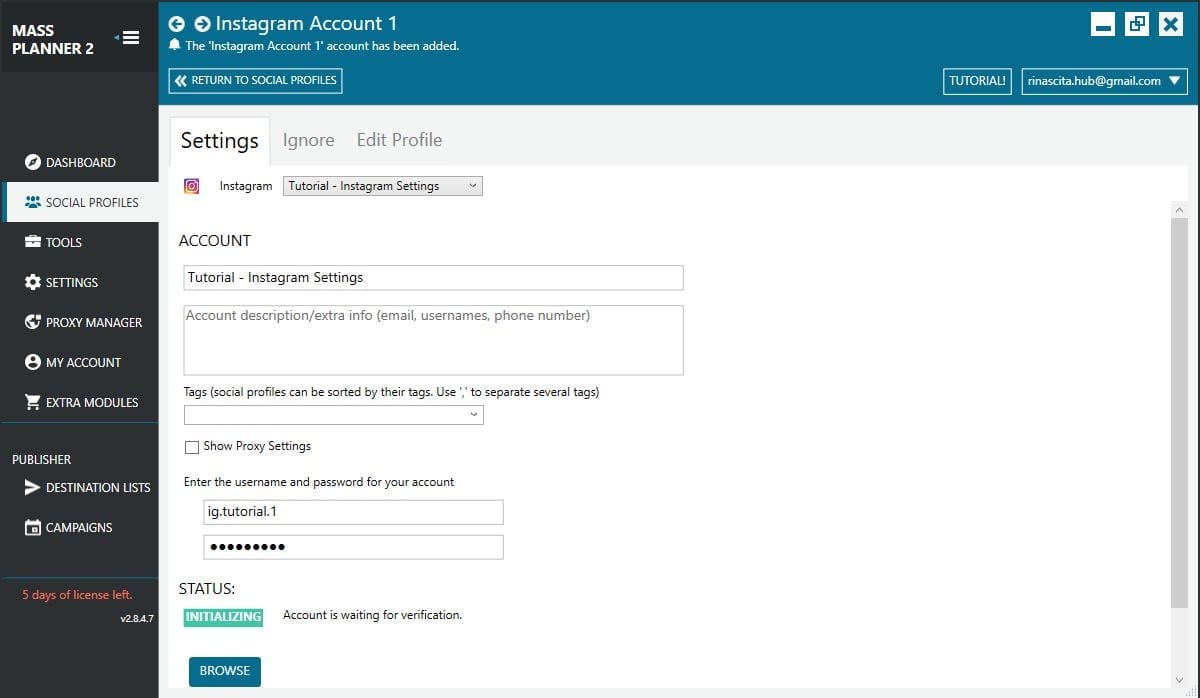
I have typed in my username and password for this tutorial and I hit VERIFY ACCOUNT as shown above. It should take a few seconds before the STATUS changes to VALID. You will notice that the account description field will automatically fill with details about the account you’ve just added. This information will come in handy especially if you’re running multiple accounts and one gets hit with a verification.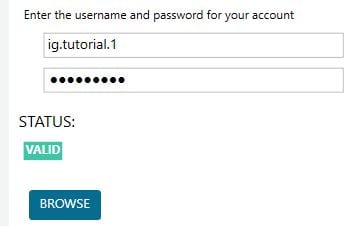
We’re done adding our 1st account (without proxy).
Tutorial 2: Setting up your Instagram accounts (unlimited) on Mass Planner installed on your PC or a VPS (Proxies needed!).
This process is almost identical to the first except we’re going to tick Show Proxy Settings.
1st things 1st! We’re going to order for proxies from a reputable proxies supplier. So head over to BuyProxies.org and order Dedicated proxies. I chose to run all my accounts with dedicated proxies because they’re way safer than semi-dedicated proxies. 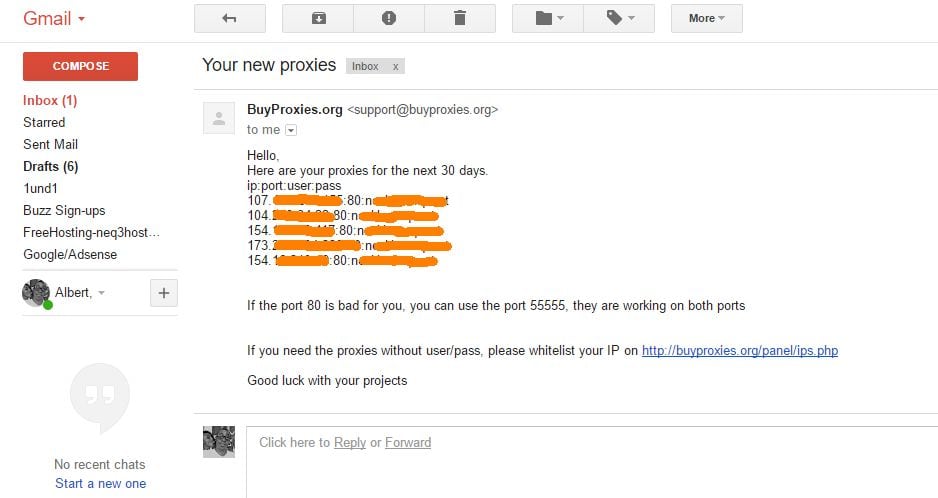
Within 10 minutes of ordering, your proxies should have arrived in your inbox.
Most people would argue 1 proxy can run up to 3 Instagram accounts but I wouldn’t do more than 2 accounts on a single proxy.
Let’s add one proxy and hit VERIFY ACCOUNT.
With that, we’re ready to start warming up our Instagram account.
Mass Planner Instagram Settings
Click on TOOLS in the left bar. Here you have all the tools available on Mass Planner. There’s also a horizontal scrollbar at the very bottom that lets us view more tools.
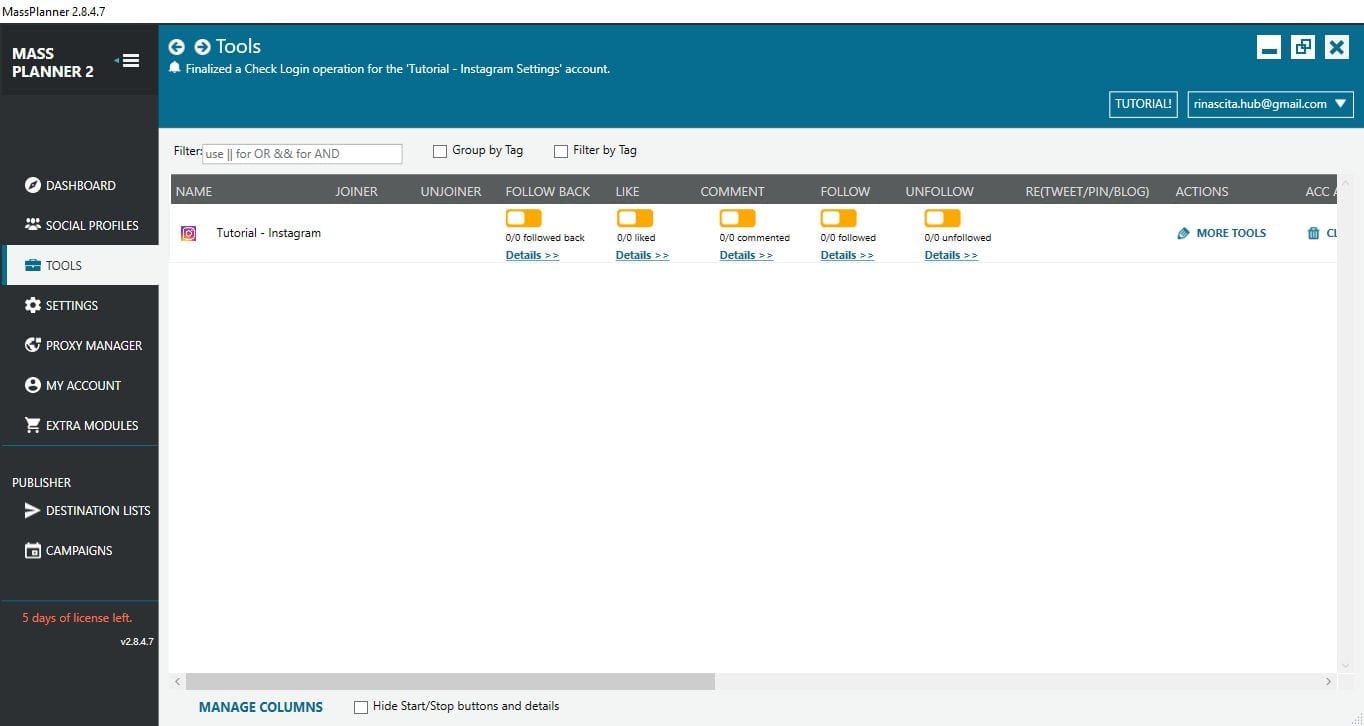
Now back to the screenshot above, under FOLLOW click on Details >> 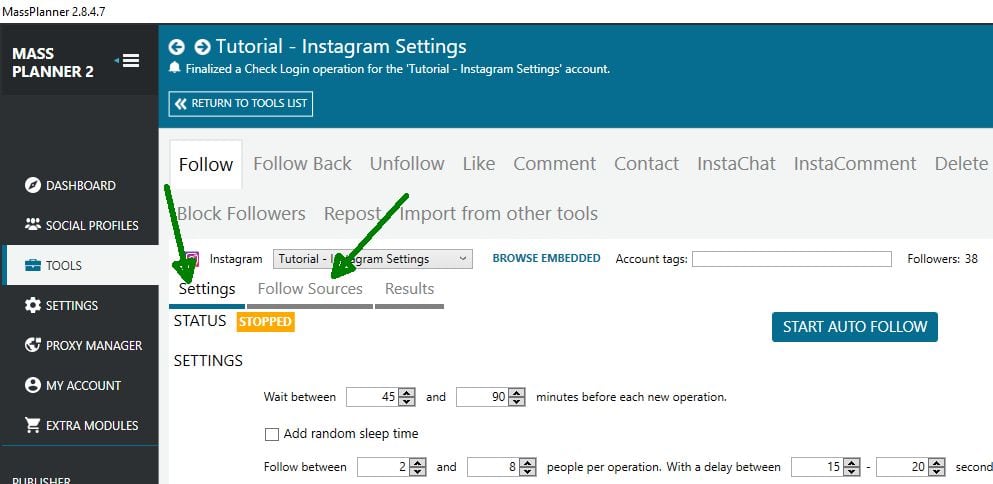
Here, we’re only going to be focussing on these 2 tabs: Settings and Follow Sources, but before we do, here’s some bonus information on how we’re going to increase the conversion/follow-back rate.
Edit: I forgot to mention that we’re also going to increase our follow rate by 30 each day. See the screenshot below.
Bonus: Increasing conversion rate
A lot of people don’t realize that you can easily increase the conversion rate by paying attention to some seemingly minor details. Accounts with huge followings will seldom follow you back. You also want to minimize the chances of following bot accounts since they’re completely useless to you and will rarely interact with your content.
So here’s how we’re going to avoid these types of accounts:
- We’re only going to follow users with a profile picture,
- Users with a minimum of 3 posts
- Users with whose bios do not contain the following keywords: buy, follow, click, link, free, hack, followers, contact. Feel free to add any others that you can think of.
- Users with a maximum of 400 followers and a maximum of 1500 followings
- Users who have posted in the last 90 days
- Skip users following our account, and…
- Like between 1-2 latest posts of users after following.
See the screenshot below. 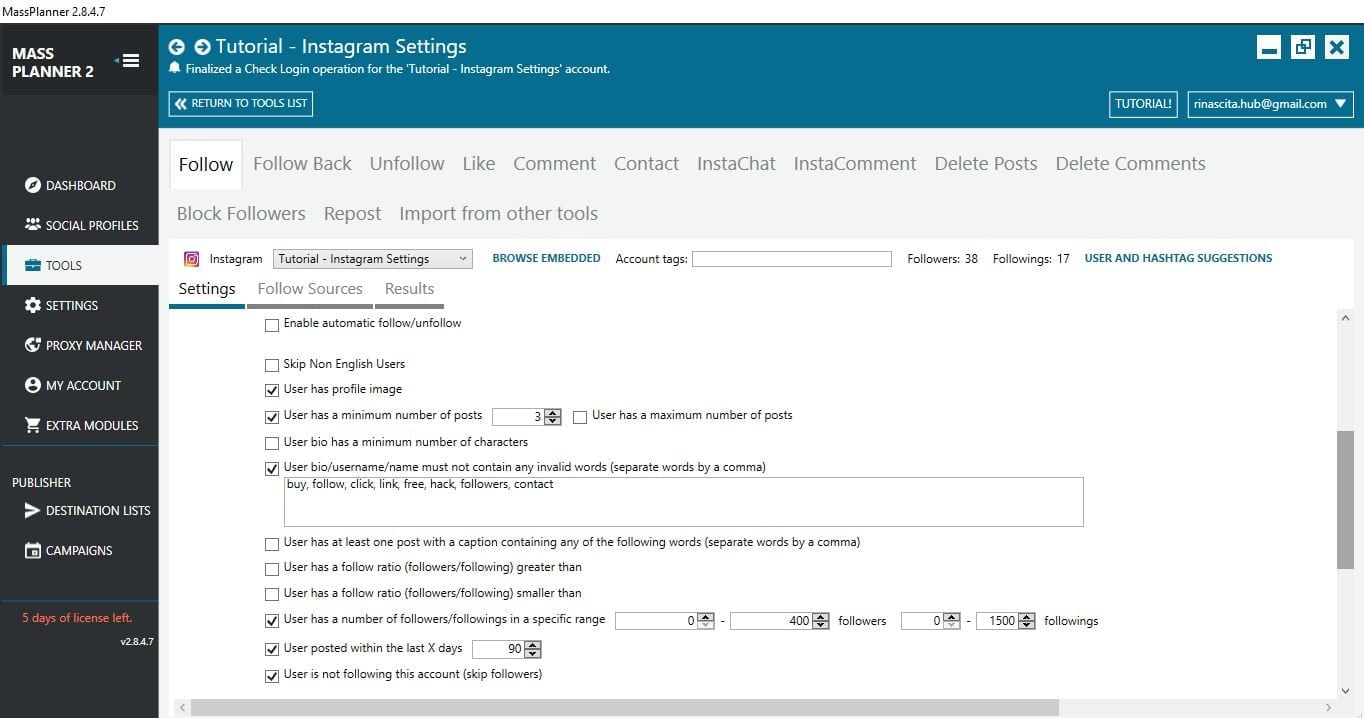
Now let’s add some target accounts. Click on Follow Sources.
Bonus: Finding/Selecting Target Accounts
Selecting the right target accounts (accounts whose followers you’re interested in) is extremely crucial for our success on Instagram. Here’s what we need to consider:
- Small to medium accounts tend to have far greater engagement that big accounts. If we target these, it’s very likely that our engagement is going to be great.
- It’s easier to find target account on mobile than on desktop. Say for instance we’re looking for target accounts in the travel niche. I picked @gypsea_lust from the search. Right next to the Follow button, there’s an arrow pointing down. Press on it to see similar accounts as suggested by Instagram. You should now filter the once you picked to make sure they fit what we’ve talked about above.
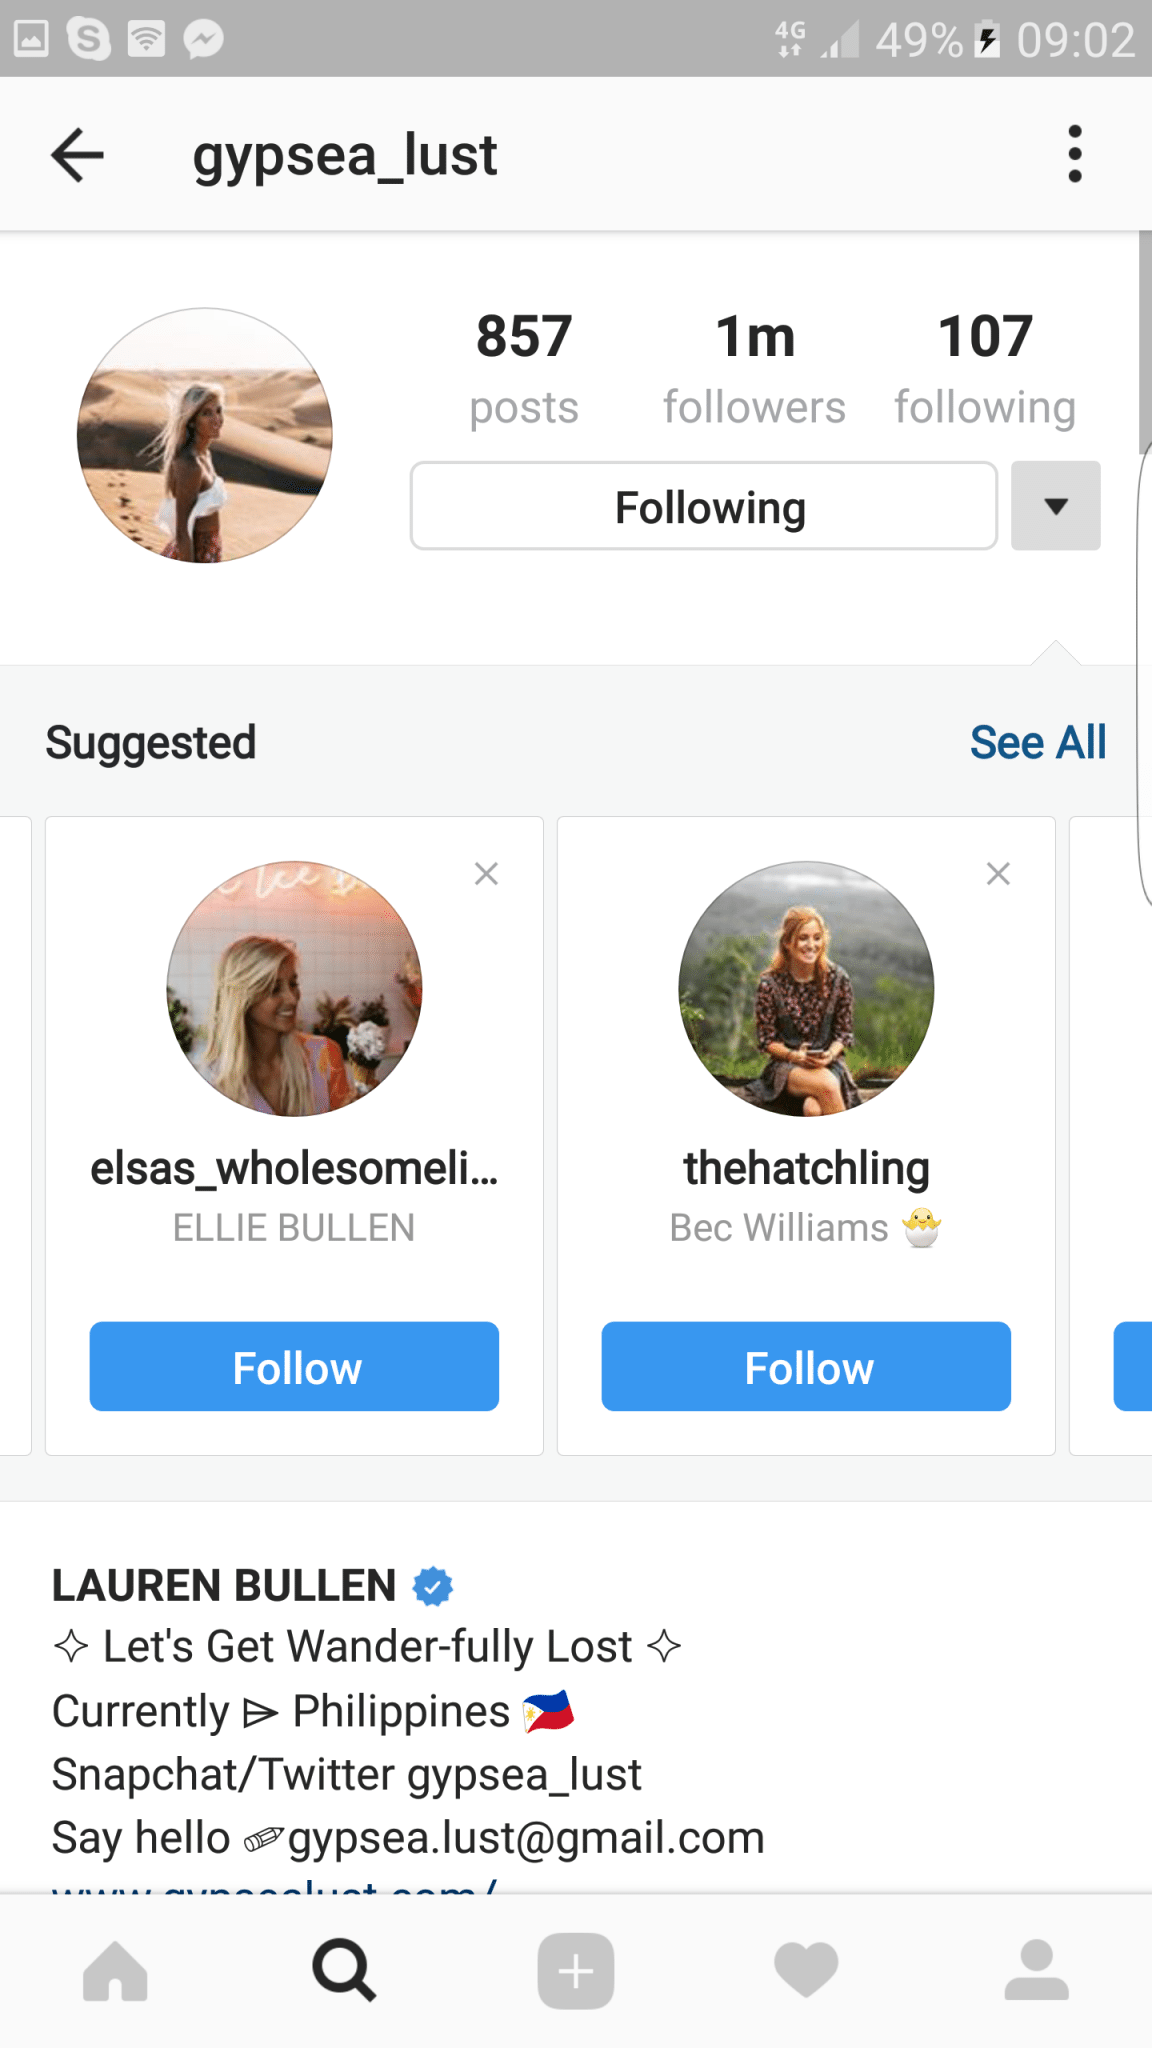
Once you have selected your target accounts, click on Follow Sources and select ‘Follow friends of target accounts‘ as illustrated below. 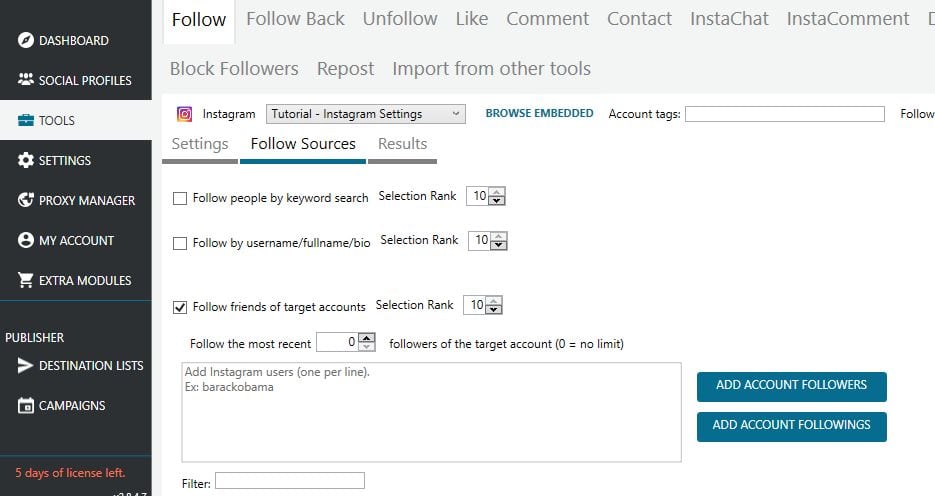
Now type in the usernames of the target accounts and then click on ADD ACCOUNT FOLLOWERS.
You’re all set!
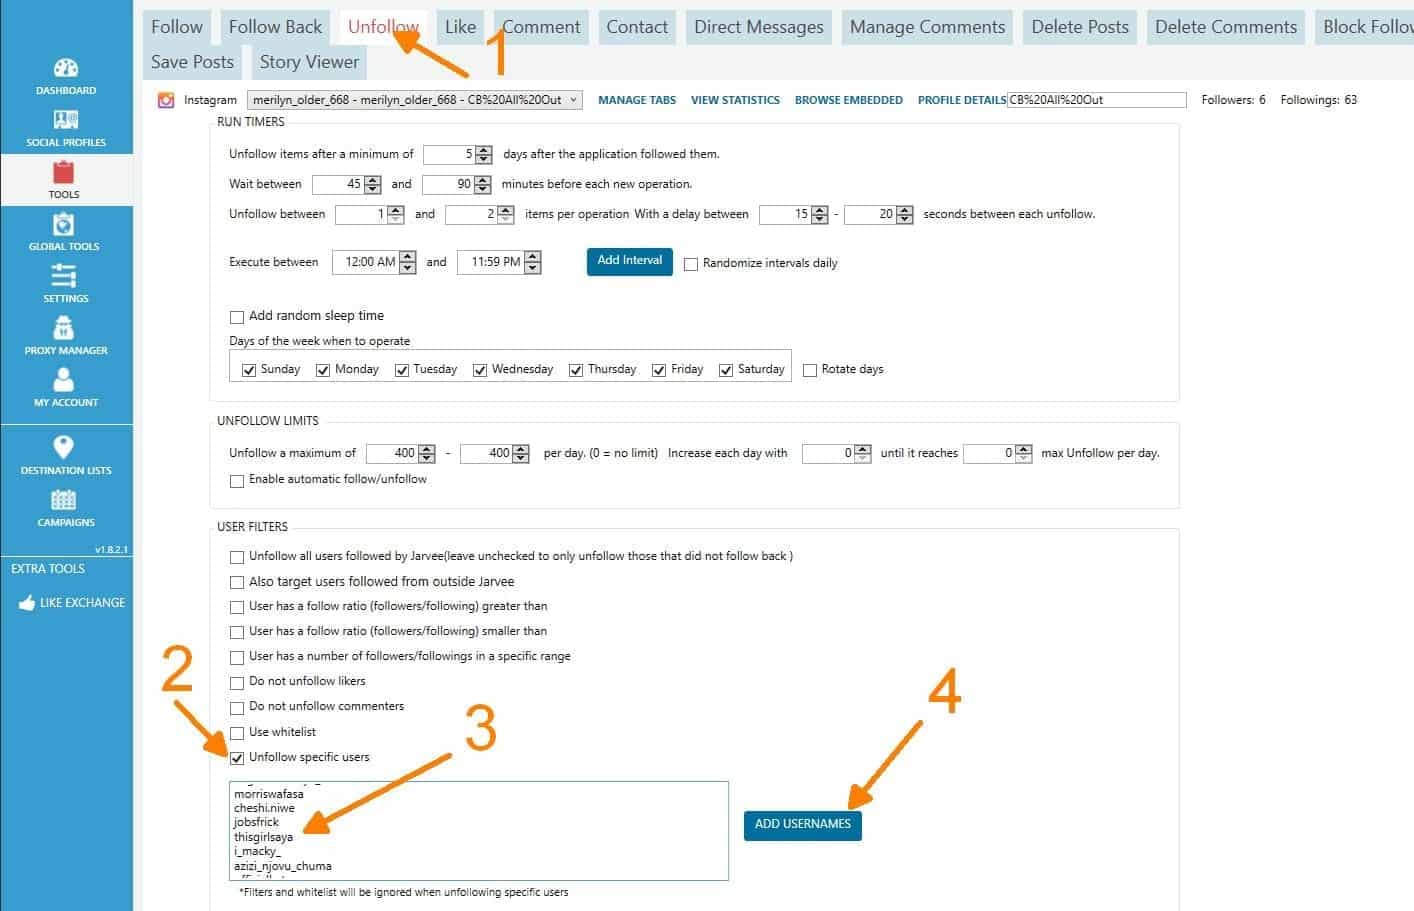
When 2 weeks are over, you can now begin unfollowing based on settings we recommended on our earlier post about the limits on Instagram.
Bonus: Finding Hashtags for Your Content
I must apologize for having not done a tutorial on how to schedule posts on Mass Planner, suffice to say, it’s actually not that necessary for me to do, as the process is quite self-explanatory. If there will be a demand for it I will do a tutorial in future articles.
Now if you’re wondering how to get hashtags for your content, head over to http://iqta.gs/ and type in a keyword in your niche. Something like ‘pets‘. 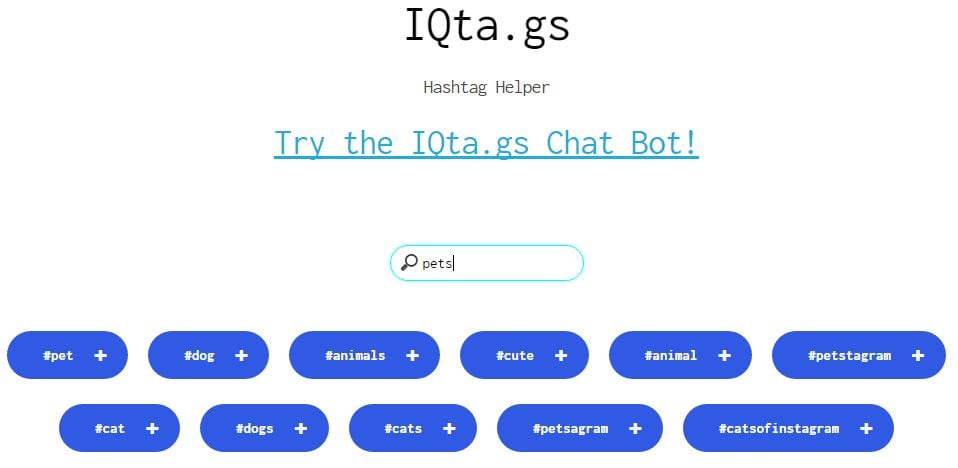
http://hashtagify(.)me (without the brackets) is another great option for sourcing relevant hashtags.
Collect enough for your content and save them for later use.
Read – This Tool Will Grow Your Instagram Account While You Sleep
Let me know if you have any questions, alternatively, you can reach on Skype under the username @diablo2562.
- FREE DOWNLOAD: Instagram + CPA Guide(PDF) to making easy money
Until next time!
